Joinery 13
Specifications for Exterior Woodworking
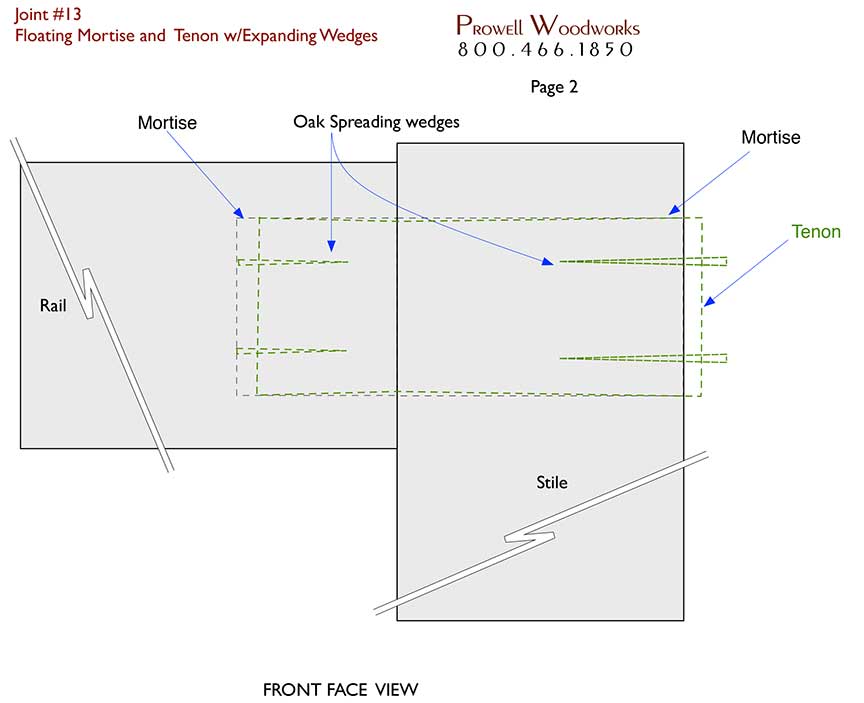
#13
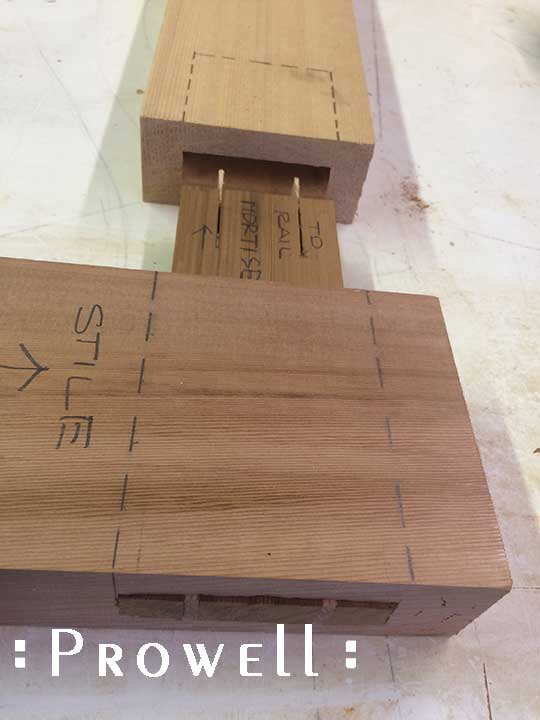
Floating Mortise and Tenon w/Expanding Wedges.
by Ben and Charles Prowell
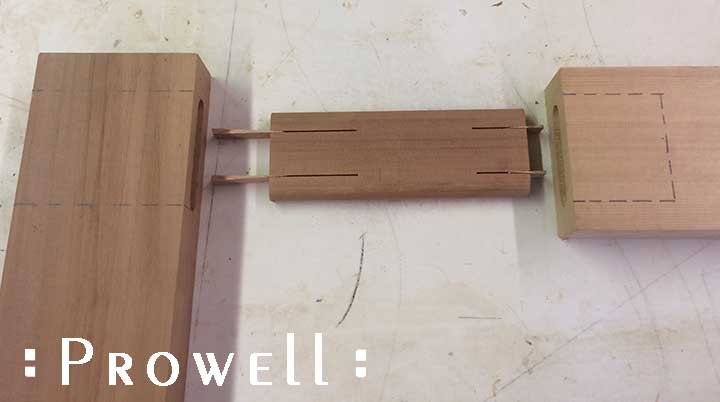
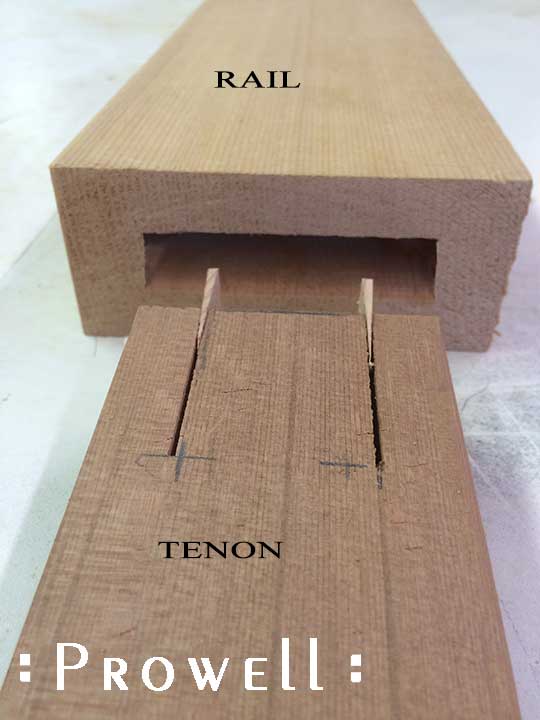
The mortise is cut into the rail, and through the stile. The tenon is kerfed to accept a pair of wedges into both the back blind edge of the rail and the exposed edge of the stile. The blind wedges are set partially in place and the tenon is pressed into the rail mortise. As the protruding wedges come into contact with the back of the mortise, the wedges are consequently driven into the tenon. Thus spreading the tenon, compressing it against fixed walls of the mortise until the blind end of the tenon becomes a butterfly. Removing said tenon is virtually impossible.
Meanwhile, the rest of the tenon is fed through the width of the stile and its own wedges driven tightly in place such to result in the same expanding width as the blind end.
The tenons are obviously dry, registering between 6-8% moisture. Set to the elements in, say, Charleston, SC, with their warm summer downpours and a relative humidity of gargantuan proportions, the tenon absorbs the moisture and expands. Resulting in a joint that is consequently even tighter than when it left the shop. In the drier seasons, as the tenon releases its moisture and contracts, it returns to the irreproachable contact of its original fit.
Click Here, or on the sketch below for the full-size, 2-page PDF.
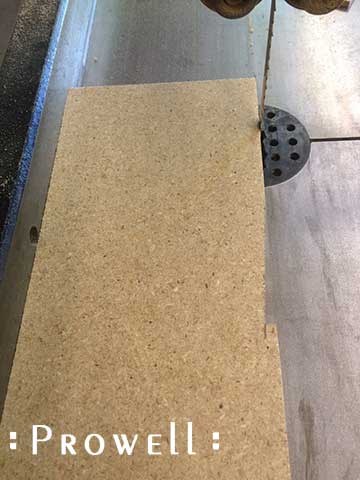
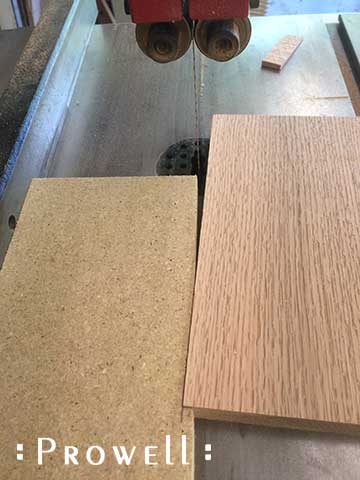
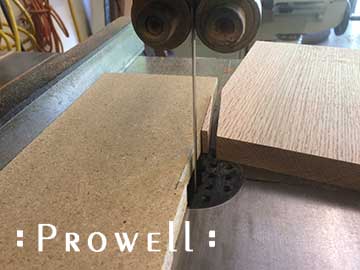
Creating the Wedges
Step #1
Step #2
Step #3
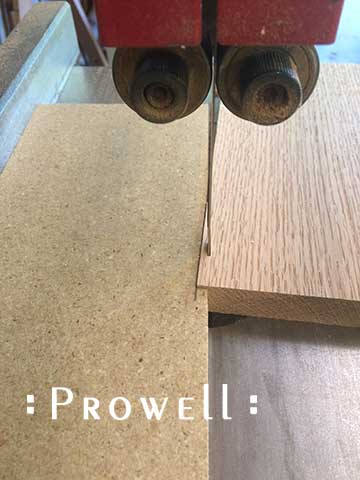
Step #4
Woodworking Joinery 13
No need for words.
Joinery #13
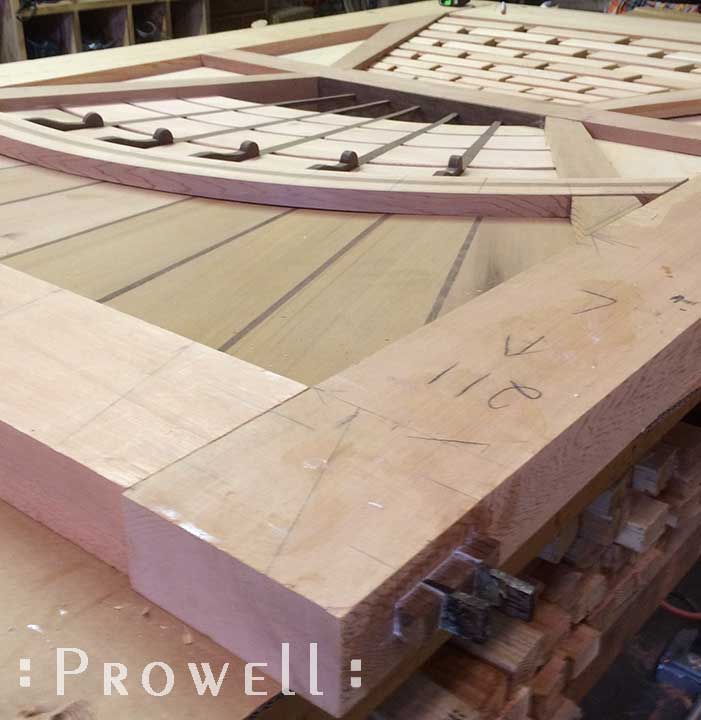
Showing the same joint but with squared off shoulders. Always better to have the geometry of right angled cheeks, but if a shop is without a stationary mortiser or the acumen to wield your chisels like a gunslinger, then losing sleep over the radiused mortise is simply being neurotic.
Joinery #13
The assembly can begin with the stile, as shown below, or with the rail. Normally the rail, with the below sequence shown only to better illustrate the blind wedges for the rail mortise.
Joinery 13
As the wet assembly and the exposed wedges driven tight. They will ultimately be cut flush and sanded smooth.
Joinery 13
Shop Views-2018
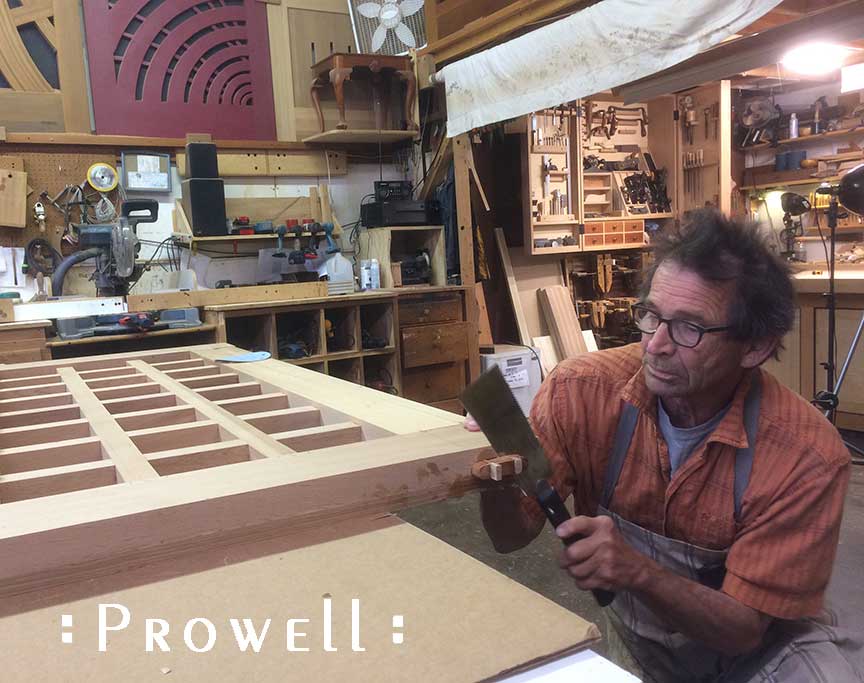
Charles cutting the top tenon flush.