
WOOD FENCE SPECIFICATIONS
Printed Installation Guides and Working Drawings arrive with all shipped or delivered orders.
WOOD FENCE SPECIFICATIONS
The workmanship involved with Prowell’s Fence Panels merits some attention to the installation. A few aspects below that will hopefully answer any uncertainties you have regarding both the product itself, and what’s required of the installer.
The actual installation goes quick enough to catch your neighbors by surprise, soliciting a quota of kudos to both you, your installers, and lastly, possibly, the Prowell outfit.
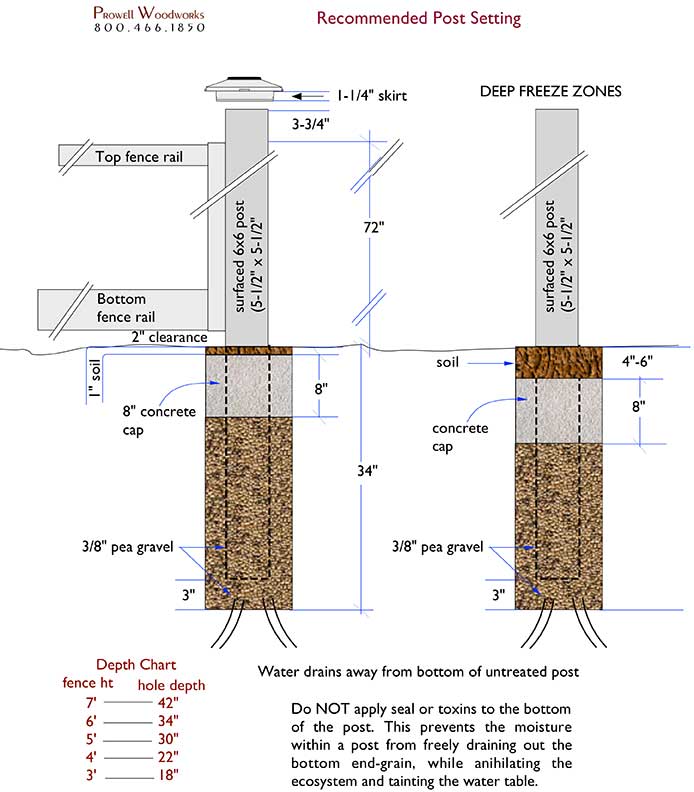
 WOOD FENCE SPECIFICATIONS for POST HOLES
The link on the left margins,”Setting Your Post” makes not only for good reading, but the extremely important role of setting the posts to our specifications, whether you’re in the fetid humidity of Georgia or the kinder temperance of San Francisco. It will result in posts that last 30-40 years. If this process is ignored, the weakest link to your new fence will be the rotting posts. Replacing rotted posts to an otherwise structurally sound fence is no small task. So below is a simple graphic worth pondering.
The Post Page also discusses the wood species for posts, listing the advantages and disadvantages of each culled from nearly 50 years of experience setting thousands of fence posts in every corner of the country.
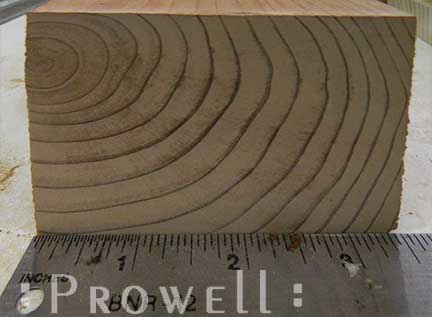
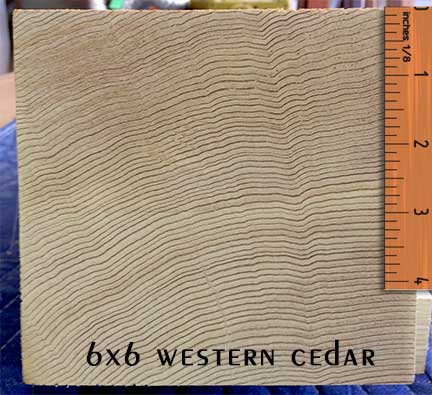
WOOD FENCE SPECIFICATIONS FOR GROWTH RINGS VS MATURE HARVESTS
Below we see the end-grain of typical post prematurely harvested. The growth rings are separated by possibly 1/4″ to 3/8″. The fiber between each ring is essentially baby fat. Fatty tissue that is immature and prone to the infestation of bacteria (Fungus, rot).
In this image we see a western cedar fence post that has been allowed to fully mature before harvest, resulting in growth rings that are approximately 1/16″ apart, resulting in mature, core fiber that has been allowed to develop its tannins, the genetic oils that thwart bacteria. >>For more on wood species and grades.
![]()
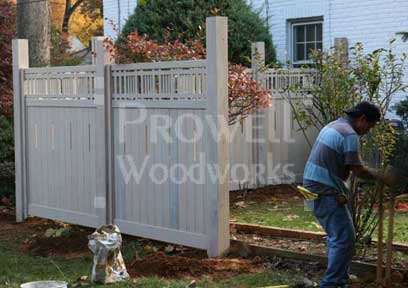
WOOD FENCE SPECIFICATIONS–INSTALLATION SEQUENCE
Working down the line in Bethesda, MD. Following the string-line along a given run, the post holes are dug as each fence post and fence panel is set. Once the run is finished, the fencepost placements are nudged with a digging bar, shifting the pea gravel, to align to the string-line before the final cap of concrete is poured in place. Whether it’s a hand posthole tool, or an auger, this is the procedure often followed. If you prefer to set your posts beforehand, use a stretcher to insure each post is set uniformly.
![]()
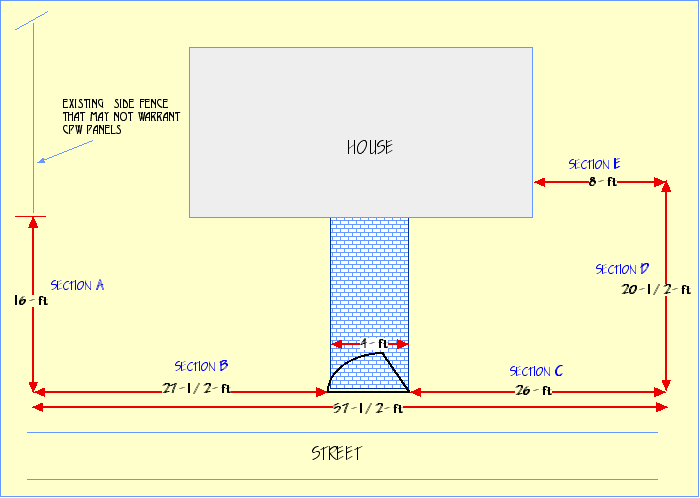
WOOD FENCE SPECIFICATIONS for LAYOUT
Below is an example of a typical fence specification for the layout of an extended fence-line. Sent in as a hand-drawn sketch or anything that allows us to separate the various sections and calculate an index of how many panels per section, and their net widths.
Among the links on the left-margin is ‘Example Layout’. It describes how to calculate the number of panels per a given run, as well as the net widths.
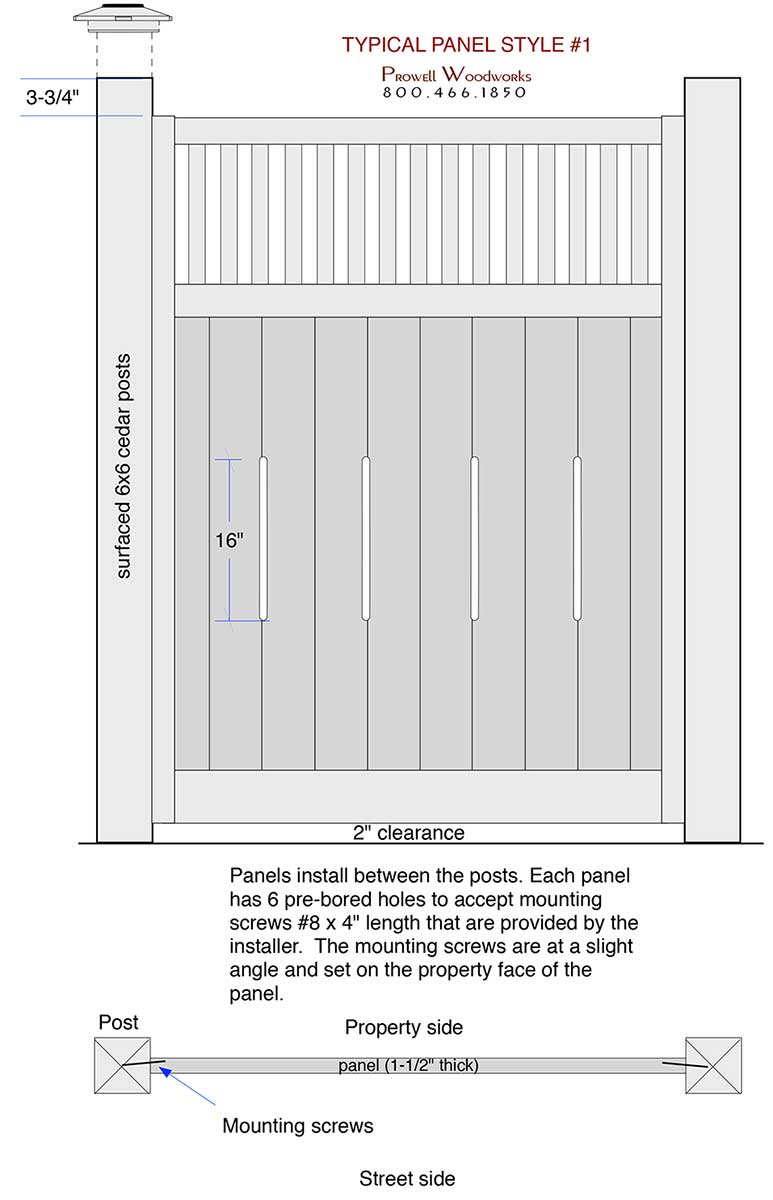
Typical Panel showing the fence posts extending 3-3/4″ beyond the top of the panel and a 2″ clearance between the panel and the grade.
Standard picket width of 1-⅝” with 1-½” spacing.
![]()
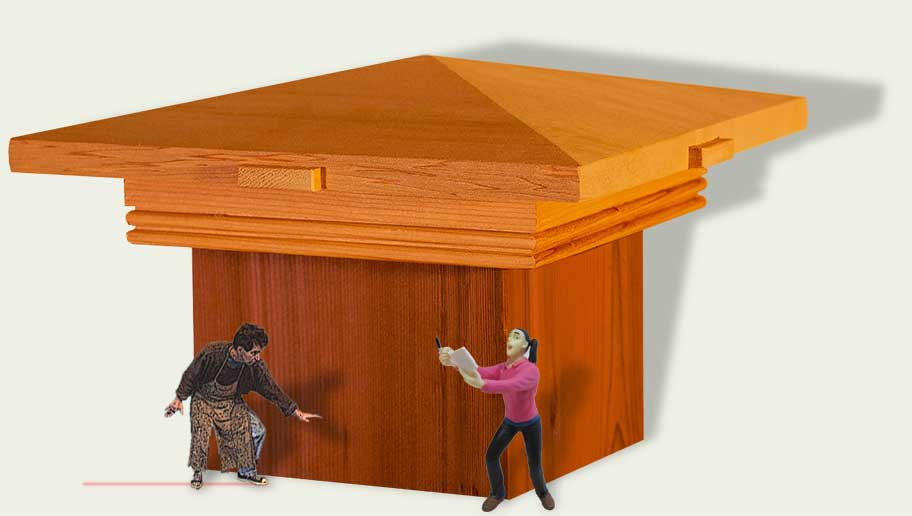
Post Cap style #1
From 4″ to 24″
Post Cap Style #2
Up to 6″ maximum post size
![]()
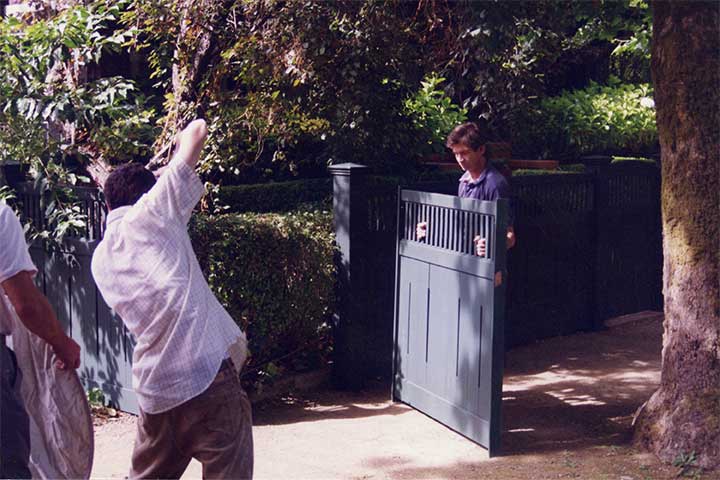
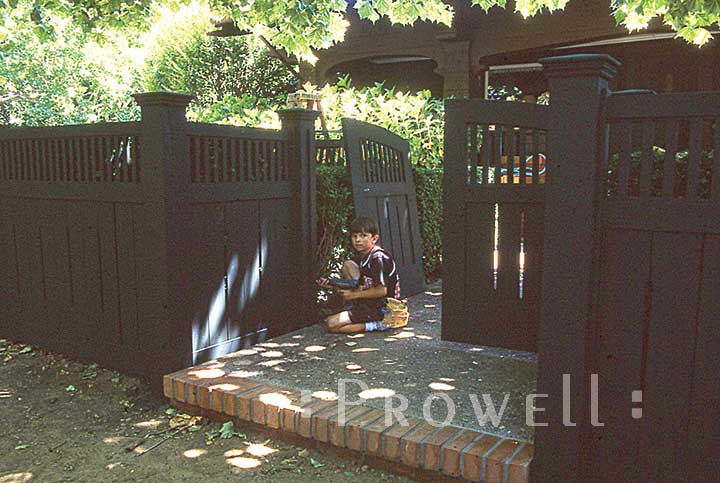
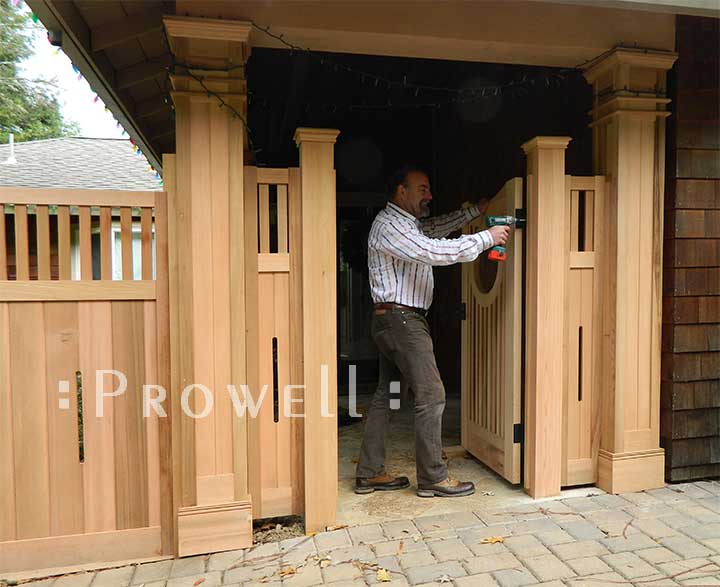
The original Prowell Fence Panel installation. The methodology for the fence panels debuted in 1996 and were consequently featured in a flurry of publications from Fine Homebuilding to Sunset Magazine. For several years when sales were still relegated to the San Francisco Bay Area, Charles(and young Ben) installed each and every commission. Once a procedure was established, the Step-by-Step Fence Installation Guide was created and this aspect of the product was left to 3rd party installers and homeowners.
Ben Prowell on site in Ross, CA. Circa 1991.
Brian Van Rheenan illustrating how the panels are easily installed between the posts Brian and his crew have been managing our local installations for more than a dozen years.
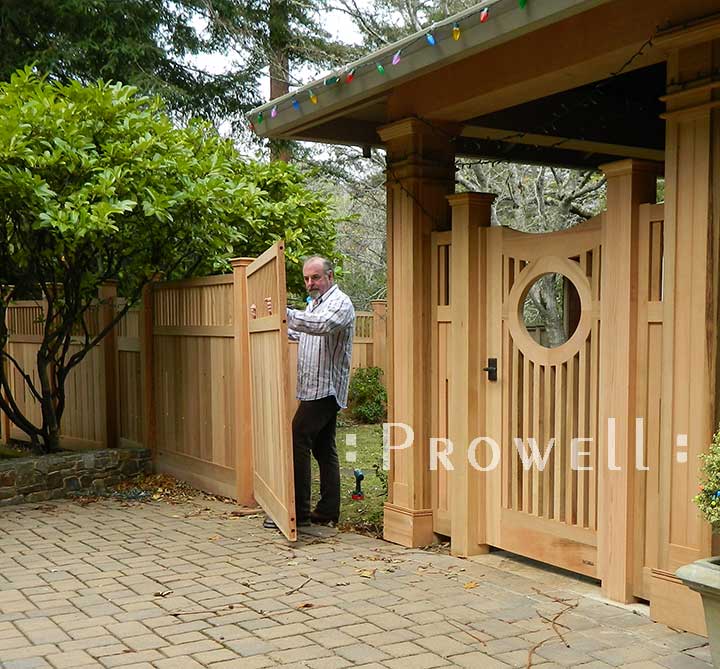
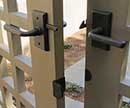
Installing the gate hinges.
![]()
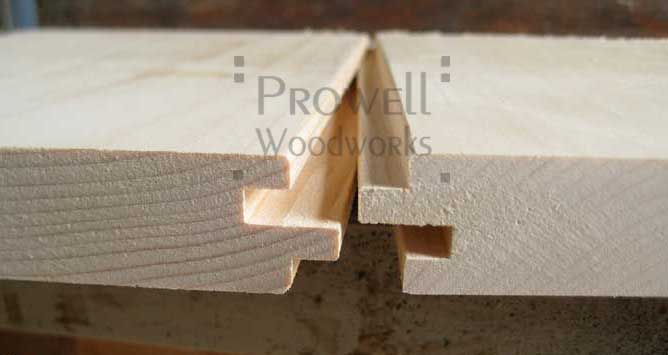
TONGUE AND GROOVE FLOATING PANELS
Not your typical off-the-shelf tongue and groove plank. The solid panels are individual planks milled specifically to provide the maximum surface mating mass.
The result is a glued up floating slab that freely expands and contracts from season to season.
![]()
WOOD FENCE SPECIFICATIONS for LIFT-OFF PANELS
For those fence panels utilized to wrap and conceal unsightly UVAC utilities, the Lift-Off Panel offers a convenient alternative to the cost of a seldom-used gate.
On the inside face of the panel, a series of mitered blocks supports the panel such that it can be lifted away for access. The Blocks marked ‘A’ below arrive mounted to the panel. The blocks marked ‘B’ are to be mounted to the posts. The net width of the panels are built 1/4″ less than the opening between posts to allow for normal expansion during the wet season. A typical panel for this use weighs about 45 pounds.
See below: HVAC Enclosures.
To view a typical Lift-Off pane, see Fence #22-3


![]()
Fence Style #22 below illustrates the aesthetics of our Cantilevered Corner. Utilizing a system of joints that insures the panel will not sag, it offers nothing more than a visual diversion that departs from every corner fence-line ever built.
Limited to a maximum of 24″ x 24″.
More information at the link on the upper left margin, or click the image below.
![]()
WOOD FENCE SPECIFICATIONS for HVAC and UTILITY ENCLOSURES
There are numerous examples on the web site where the HVAC units are enclosed with solid panels and an access gate. All of which adds to the existing architectural mass of the house. After decades of these orders from all of those with central air conditioning, we eventually addressed the need with a design layout that eliminates the cost of a little used gate, as well as reducing the posts from six to four. Coupled with the more open exposure of the pickets and upper grids, we add a more lightly designed footprint to the existing architecture.
Two Cantilever Corner Panels used on both ends.
A height off the grade of only 46″
A center Lift-Off Panel
![]()
PANEL SPECIFICATIONS FOR GABLED TOP CAPS
The optional Gable Cap. Available on all panels as an aesthetic feature that also adds to the overall rigidity.
For more on Gable Top, see Fence #19

![]()
NARROW PICKET SPACING
Left: Prowell’s Fence style #2 on Standard spacing at 1-1/2″. On the right, the same fence style with ¾” spacing.
3/4″ spacing is an additional 23% above whatever percentage is listed for any given fence style with standard 1-1/2″ spacing between pickets.
So if we have a fence style listed at Base + 14% with 1-½” spacing, that same fence with ¾” spacing would be Base Cost + 37%.
Reducing the spacing to 3/4″ allows a more private enclosure while maintaining the basic elements of design. Standing more than 6 º off center and the visibility between any picket spacing is eliminated.
>>For more examples of narrow-spaced pickets, see Fence #2-9 and #2–6


![]()
AA thorough explanation can be found on the Sloping Grades link along the upper left margin of this page and the Home Page
LEFT:
The fence panel to the right of the gate climbs up a the sloping grde while maintaining the levelalignment across top.
RIGHT :
A long continuous slope where the fence panels are built ‘on the bias’


![]()
A thorough explanation can be found on the Terraced Grades link along the upper left margin of this page and the Home Page
LEFT:
Changes in the site elevation can require transitions within the same fenceline.
RIGHT :
A series of fence panels stepping along a continuous slope. Each step is equal.


![]()
![]() MISHAPS
MISHAPS
The following images illustrate the rare mishaps when things simply go wrong.
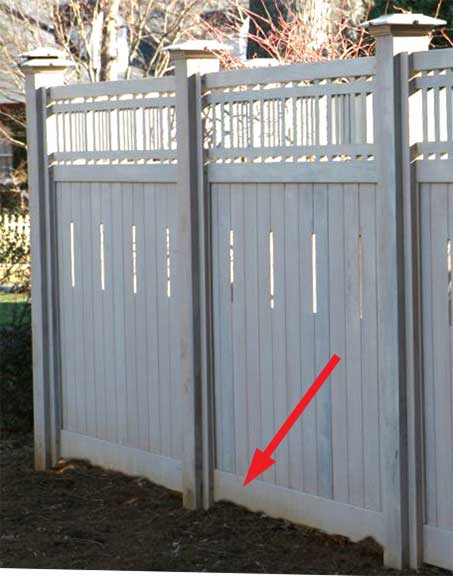
2″ Clearance
An example of setting the panel too close to the grade, inviting bacteria to set up house along the bottom rail.
The panels are spec’d for a 2″ clearance between the grade and the panel. And although it’s cedar and one of the most resistant species to bacteria and fungus, why tempt a starving ecosystem?
Reading a Level?
Not a fence panel, but we’ve included it here as a shocking reminder to take your time, read your level twice, and if you’re in Georgia, as these folks, be mindful of what you add to your morning coffee.
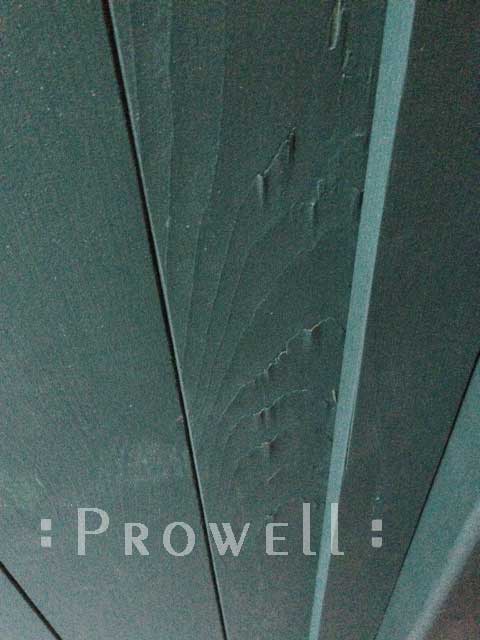
CATHEDRALING
The below image represents something called “cathedraling”. When figured grain is oriented upwards, and a paint or solid body stain has been applied prior to shipping, gravitating moisture can lift the grain. Shortly after, we switched to a vertical grain grade of cedar and the problem was eliminated forever.
Why? The cedar is genetically coded for the climates of the Pacific Northwest. It ships to the Prowell shop with a similar climate, as well as the protection of being inventoried in the shop. When it finally ships, to say Washington DC, in August, the cedar must acclimate to the change in climate. For the first several weeks it expands in a reaction to the new, humid climate. If it had been finished with a non-flexible finish, such as paint, the paint is unable to swell at the same rate for those first few weeks and we can potentially see the below result.
For this reason we do not offer pre-finishes in paint or solid body stains nor any finish that includes an inflexible ingredient.
See Pre-Finish Options for a full description of approved finishes.
SHRINKAGE
Once the fence panels are finished, the solid floating insert panel may shrink slightly in the warmer, drier months and create a reveal that exposes raw unfinished wood. Your solution is to simply touch this up with the extra finish you saved in your garage. Come the wet season and the panel will swell and the reveal will be hidden. Below, the grain direction of the insert panel is horizontal. Wood will change dimensionally perpendicular to the grain.
![]()
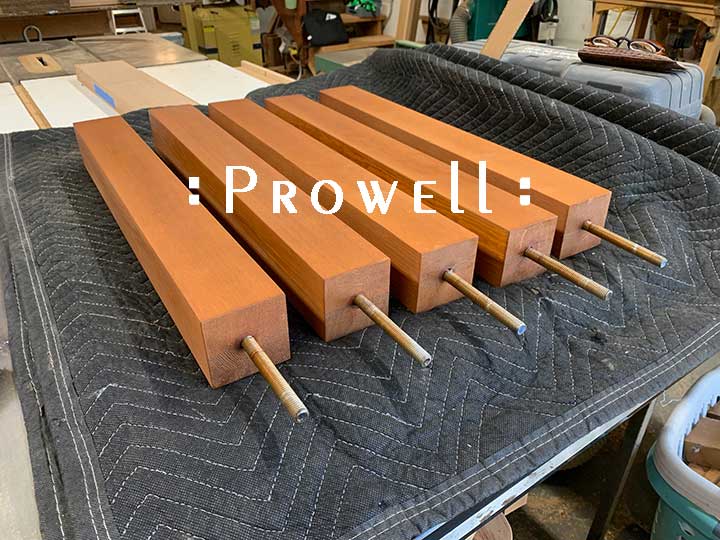
Your Content Goes HereTypical fence posts for the Pony Panels, shipped with threaded rod that seats into corresponding bores in the top of the wall. 3″ x 3″ x 24-1/2″ ht.
PRODUCT SPECIFICATIONS NAVIGATION
![]()
Garden Gates
![]()
Driveway Gates
![]()
Fence Panels
![]()
Porch Swings
![]()
Columns
![]()

Hardware
![]()