
GARDEN COLUMNS & GATE COLUMNS
GATE COLUMNS and LIGHTED GARDEN COLUMNS SPECIFICATIONS
![]()
Various Mounting Applications
As Garden Columns
Front Elevation Sketches
As Gate Columns
*To Embedded Steel Frame
*To Exposed Steel Frame
*Mount to Lighted Columns
*Mount to Unlighted Columns
*To Wood Posts
*#2 (To Steel Posts)
*Center Mount
LIGHTED GARDEN COLUMNS SPECIFICATIONS
The wood garden lighting columns ship as wood columns only. As of 2024, we no longer provide the lighting fixtures; the technology within the landscape lighting genre develops at a pace we ultimately realized is best left to on-site professionals to provide the appropriate fixtures. Much like we do with our driveway gate automation. Many of the below images illustrate various fixtures as low-voltage LED’s with the wiring stubbed out at the bottom for junctioning to the source. These should serve the purpose of illustrating the installation sequence.
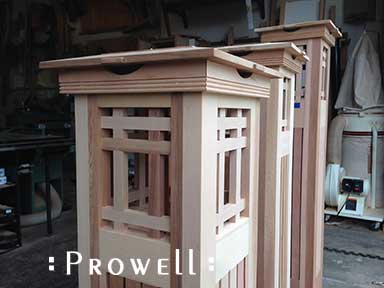
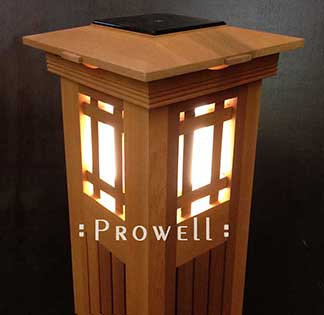
Typical upper grids of landscape wood columns specifications for style #8–prior to the white Plexiglas.
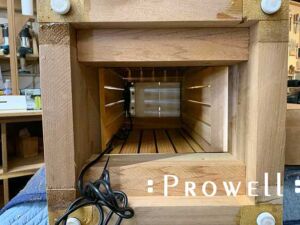
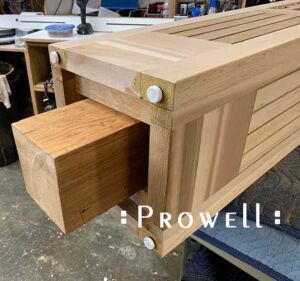
The wood garden lighting columns specifications show a hollow core with blocking to accommodate either 4×4 or 6×6 support posts in wood or steel. Garden columns slip over the site posts, whereas gate columns arrive with one side removable so the columns can fit around the site posts and the 4th side closed on site. Below, the view from the bottom of the column.
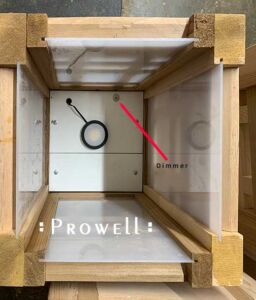
Looking down from the top. The arrow at the dimmer control. The lighted column specifications for the fixtures.
Access to setting the fixture by removing the plex.

White Light 1/4″ plexiglas 60% transparency. The plex slides along routed grooves.

Simulating a typical surfaced 6×6 post fitting within the spacer blocks. The garden columns come with spacer blocks accomodating the size of the post, + 1/8″ wiggle room.
Showing the inside access to the column

The most recent iteration of fixtures selected by a 2025 installation managed by the electrical contractor
Showing the typical coated lags securing the column-to-post connection. The lighting column mounts to the post on one side only.
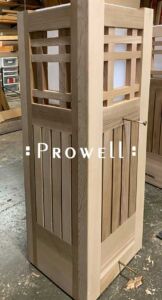
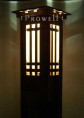
Garden lighting columns Style #8.
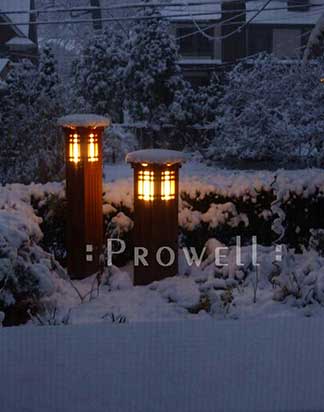
A pair of lighted Garden Columns in in a Detroit snowfall.
![]()
GATE COLUMN SPECIFICATIONS
The lighted gate column specifications have only two sides featuring the open grids–facing the street and property. The other two sides are solid, as shown below, with a pair of small relief slots to both ventilate the lighting fixture but also providing an intriguing visual at night.
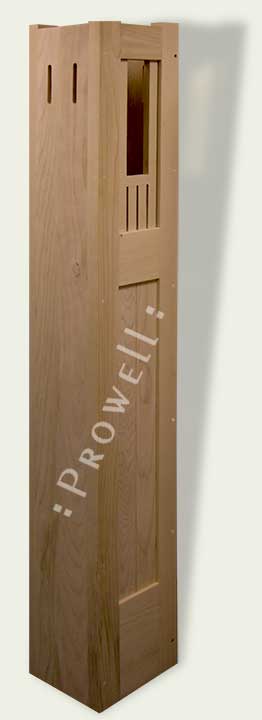
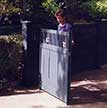
Gate Column Style #2 as an early unlighted installation.

![]()
GATE COLUMN SPECIFICATIONS–INSTALLATION
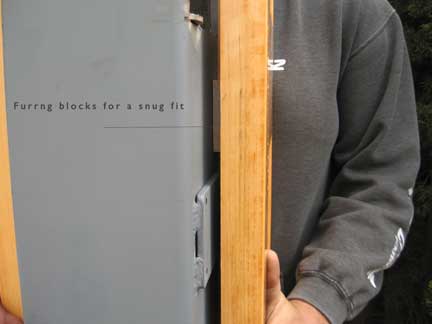
Fitting an unlighted 3-sided gate column around a steel post.
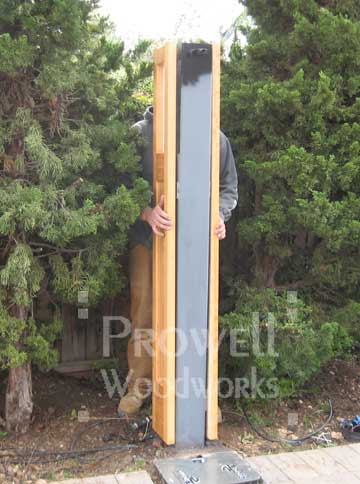
The gate columns arrive with blocks furred to a snug fit to the given specifications of the site post.
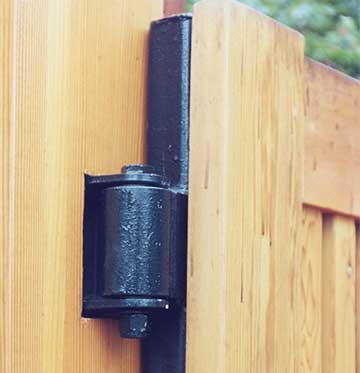
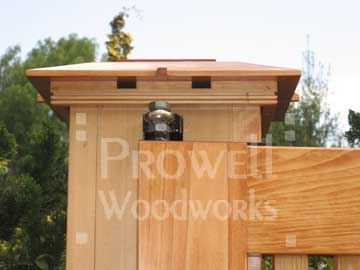
For In-Ground automation, the gate column specifications require a top pivot hinge shown mortised through the column (and welded to the steel core).
Knuckle style hinge shown mortised through the column and welded to the edge of the steel frame.
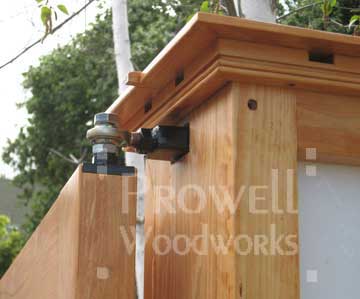
Another view showing In-Ground Operators with a hinge placement to pivot on the top of the gate. Prowell provides the steel plate mounted to the top of the gate stile.
![]()
The following text is copied and pasted from Prowell’s Installation Manual.
Landscape Lighting and Gate Column Specifications: Drive Gate
(2-1/4″ -thick gates under 12′ overall width and not mounted to steel frames)
The Garden and Gate Columns are shipped as 3-sided assemblies. The net width of your Drive Gate is configured to the width between the installed posts, less the dimensions of the columns. Whether you are using 6×6 steel or wood posts, the columns are designed to slip into place around your existing posts, held snug to the post dimension by filler blocks mounted to the inside of the column.
Before securing the fourth side, secure the lighting column to the inner post using the provided mounting bolts and the pre-bored locations found on the solid sides of the Columns. Using these bores as guides, bore through the steel post wall when using steel posts, and secure the Column by using the bolts and lock-nuts provided. This is close to the top of the steel post and accessible. (Note: it helps to use a 1/4″ or 5/16″ dia. Tungsten drill bit to bore through the steel post walls.) With the Column secured, the fourth side, usually facing the property, is secured to the column assembly. Pre-bored screw holes mark the location. Screws and wood plugs are provided with the Columns. (It is best to fit your wood plugs using exterior wood glue). If you want to insure this joint remains tight, use a bead of TiteBond 3 glue along these edges before screwing to place. Keeping in mind, however, that this requires you to lift the Column away from the steel post in the unlikely event it should ever need to be removed.
Landscape Wood Lighting Columns Specifications: Before securing the fourth side to the column, insure your low-voltage wiring is in place and fed out at the bottom of the Column, where it will be junctioned to the power source by your contractor. The Pedestrian or Wood Drive Gates hinge to the Column in exactly the same way they hinge to a normal post. Drive gat6es are provided with 4-1/2″ butt hinges, with the gates pre-marked, but the column hinge-holes left to be set on the site by the installer. This procedure is covered in detail under the Installation Guide.
With the gates hinged in place, the last step is to set the Post Cap over the column and secure it in place with the pre-bored holes on the cap apron. The cap should be oriented so these holes are set to the solid faces of the Columns.
(Gates over 12′ overall width and mounted to steel frames)
Drive Gates mounting to steel frames will require the 6×6 steel posts be configured with steel T-Bar straps that are welded to the steel posts. These small flat-iron extensions are normally about 2-1/2″ wide by 1/8-1/4″ thick, and approximately 3-1/2″ long. Two per post. The location of these are called out in the drawings provided by CPW of the steel frame dimensions. Their exact dimensions are verified from the field once the steel posts and the steel frames have been installed by the automation contractor. With this dimension, we make a small mortise in the Columns that allow them to slip over the steel posts and fit to the T-bar extensions. The T-Bar extensions are long enough to extend proud of the Column approximately 1/2″, allowing for the knuckle barrel hinge on the steel frame to weld to the ends of the T-bars. This also insures that the entire bearing load of the wood gate and steel frame are drawn from the steel post and not the Wood Columns.
Landscape Lighting Garden Gate Columns Specifications:
The columns arrive as three-sided assemblies, slipping around your gate posts and the fourth face fixing in place through pre-bored holes and plugs. The garden gate hinges from the columns in exactly the same manner as when mounting from wood posts or jambs.
At 10-1/8″ square. The inside dimension is 7-1/8″. Filler blocks are mounted inside the columns, planed to a thickness that accommodates the dimension of your post. If your existing gate post is a surfaced 6×6 (5-1/2″ sq), the net rough opening distance between the gate columns will be 4-5/8″ less than between your posts. This is the rough opening available for your gate. So, for example, if you have 48″ between surfaced 6×6 posts, your actual gate rough opening, with the columns in place, will be 43-3/8.” If you are using surfaced 4×4 posts (3-1/2″ sq), your rough gate opening between columns will be 6-5/8″ less. A 48″ opening between 4×4’s nets, with columns, to 41-3/8″.
The pedestrian gates hinge off the columns in the same manner as with wood posts or wood jambs. This is also true for drive gates under 12′ overall width, requiring no steel frame and at 2-1/4″ thickness gates.
Garden Lighting Garden Columns Specifications:
The Garden Column was designed primarily as an architectural lighting source within the landscape. These require 4×4 or 6×6 wood or steel posts set into the grade and extending approximately 2-3 feet above ground–(The Prowell drawings will call out the exact height of each site post). The Column arrives as a compete four-sided assembly, slipping over the top of the wood post. The wiring is fed out under the bottom of the Column and junctioned to a low-voltage power source.
The Column is secured to the post using the pre-bored screw holes and coated lags. The Column Cap slips over the Column and is secured using the pre-bored holes and screws. Access to the fixture or Plexiglas sheets that back the upper grid pattern is allowed by removing the Cap.
PRODUCT SPECIFICATIONS NAVIGATION
![]()
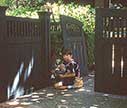
Garden Gates
![]()
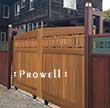
Driveway Gates
![]()
Fence Panels
![]()
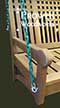
Porch Swings
![]()
Columns
![]()
Hardware
![]()